Internet and AWS
Intro
Before we can deploy an application to the world, we need to understand the world it's being deployed into. The internet is not magic — it is a massive, interconnected system of physical machines, and every request you make from your browser travels through that system to reach one of them.
In this lesson, we'll pull back the curtain on how the internet works, look at the major hosting providers that rent space on that system, and then create our very first cloud server using AWS EC2.
Lesson
What is the Internet
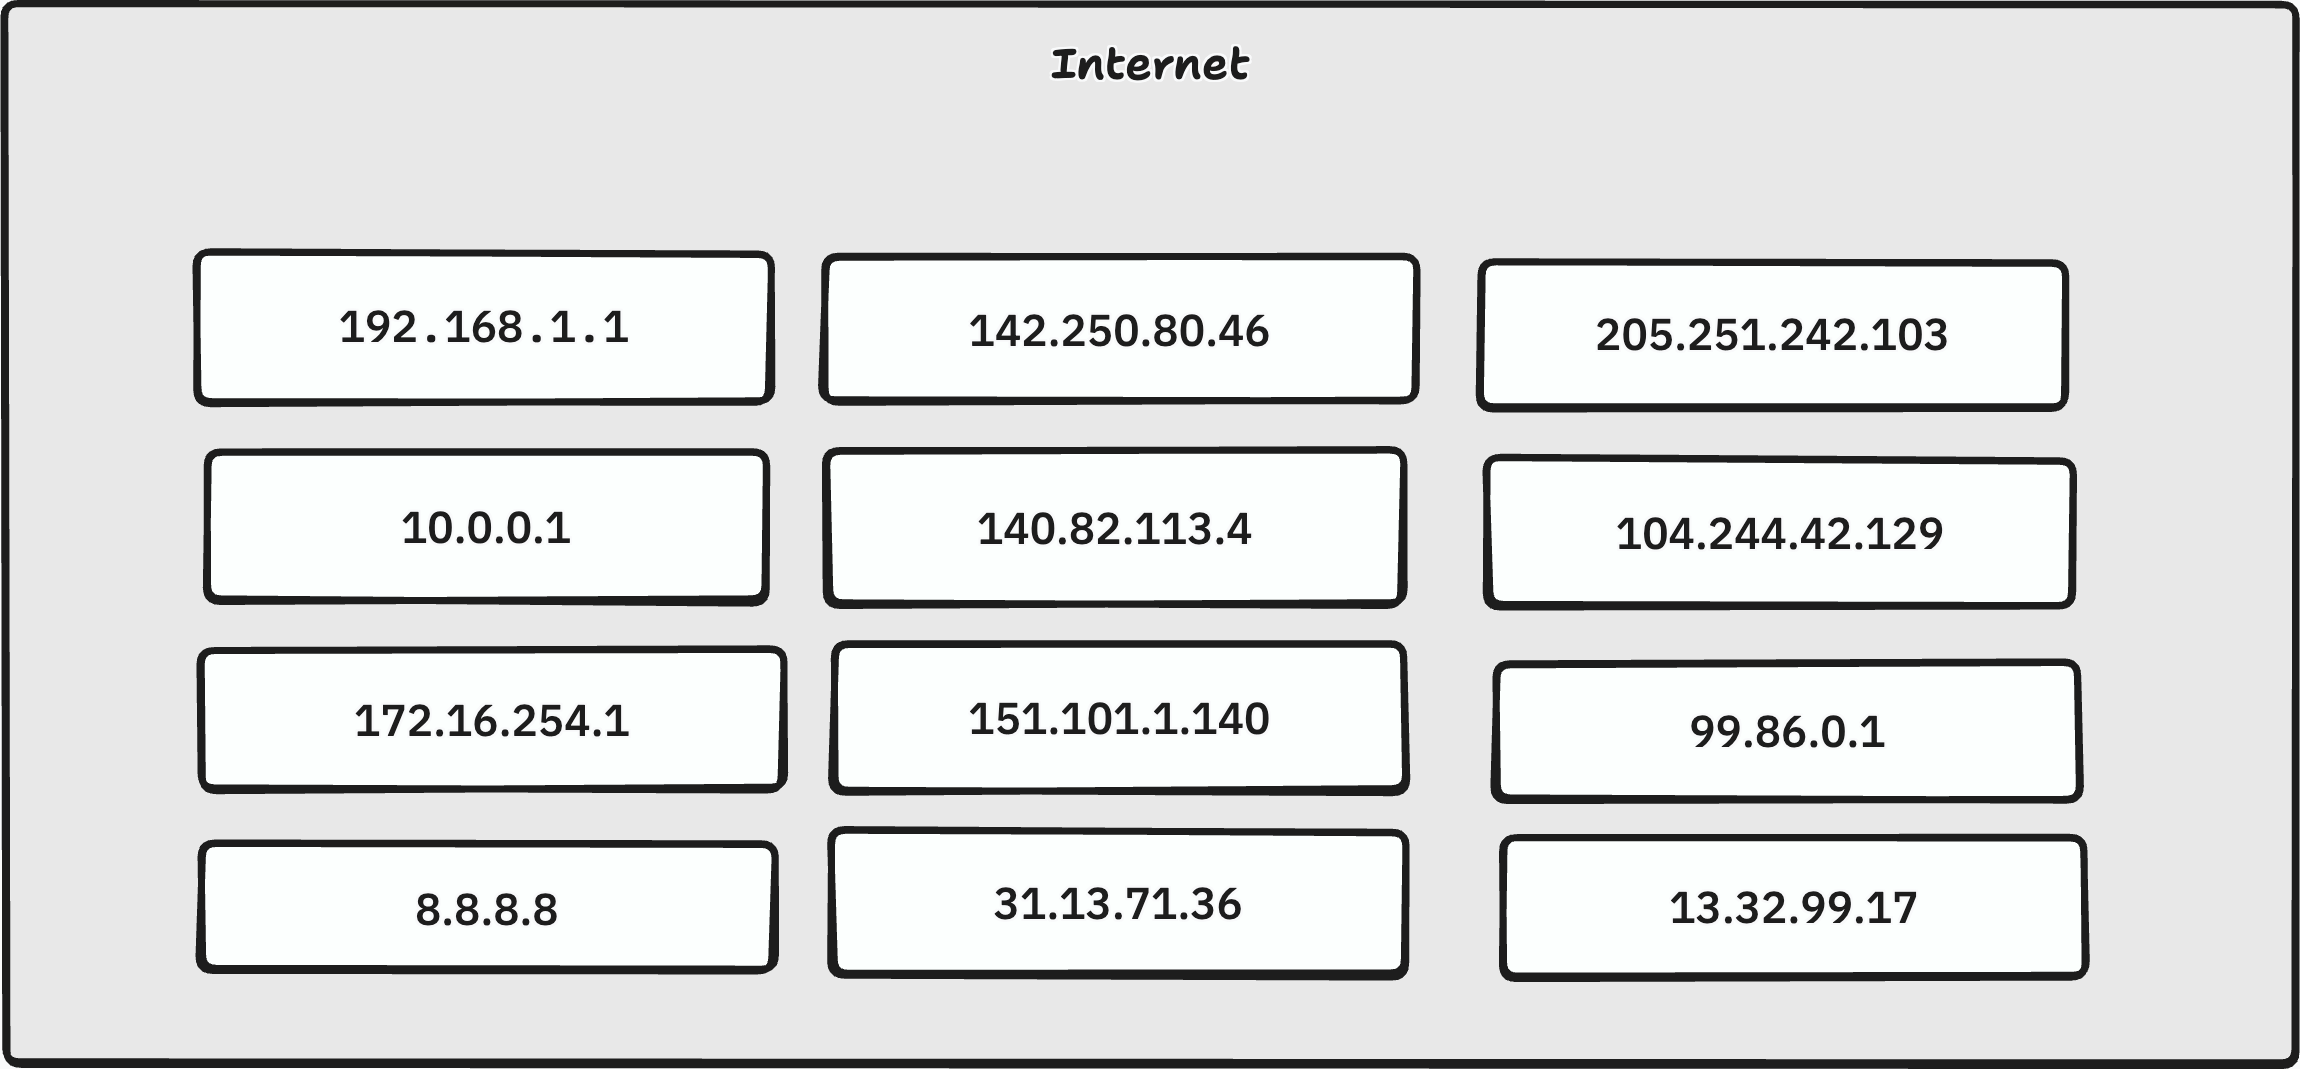
Think of the internet as a very large city block. Each house on that block is a server — a physical computer running somewhere in the world. Just like a house has a street address that tells the postal service exactly where to deliver a package, every server has a unique numerical address that tells the internet exactly where to send data.
When you buy a house, you own that physical space at that address. When a company like Google or Netflix wants to make their service available to the world, they do something similar — they either own or rent space on one of these "houses" (servers), and the internet knows how to find them.
The key insight is this: the internet is not a cloud floating somewhere in the sky. It is a global network of real, physical machines — many of which you could walk up to and touch if you had access to the data center they live in. When you visit a website, your computer is quite literally sending a message to another computer, somewhere in the world, and waiting for a response.
What is DNS?
Every server connected to the internet has a numerical address called an IPv4 address. An IPv4 address looks like this:
142.250.80.46
Four numbers, each between 0 and 255, separated by dots. That address uniquely identifies a single machine on the internet. In theory, you could type that address directly into your browser and reach the server — but nobody wants to memorize 142.250.80.46 when they just want to check their email.
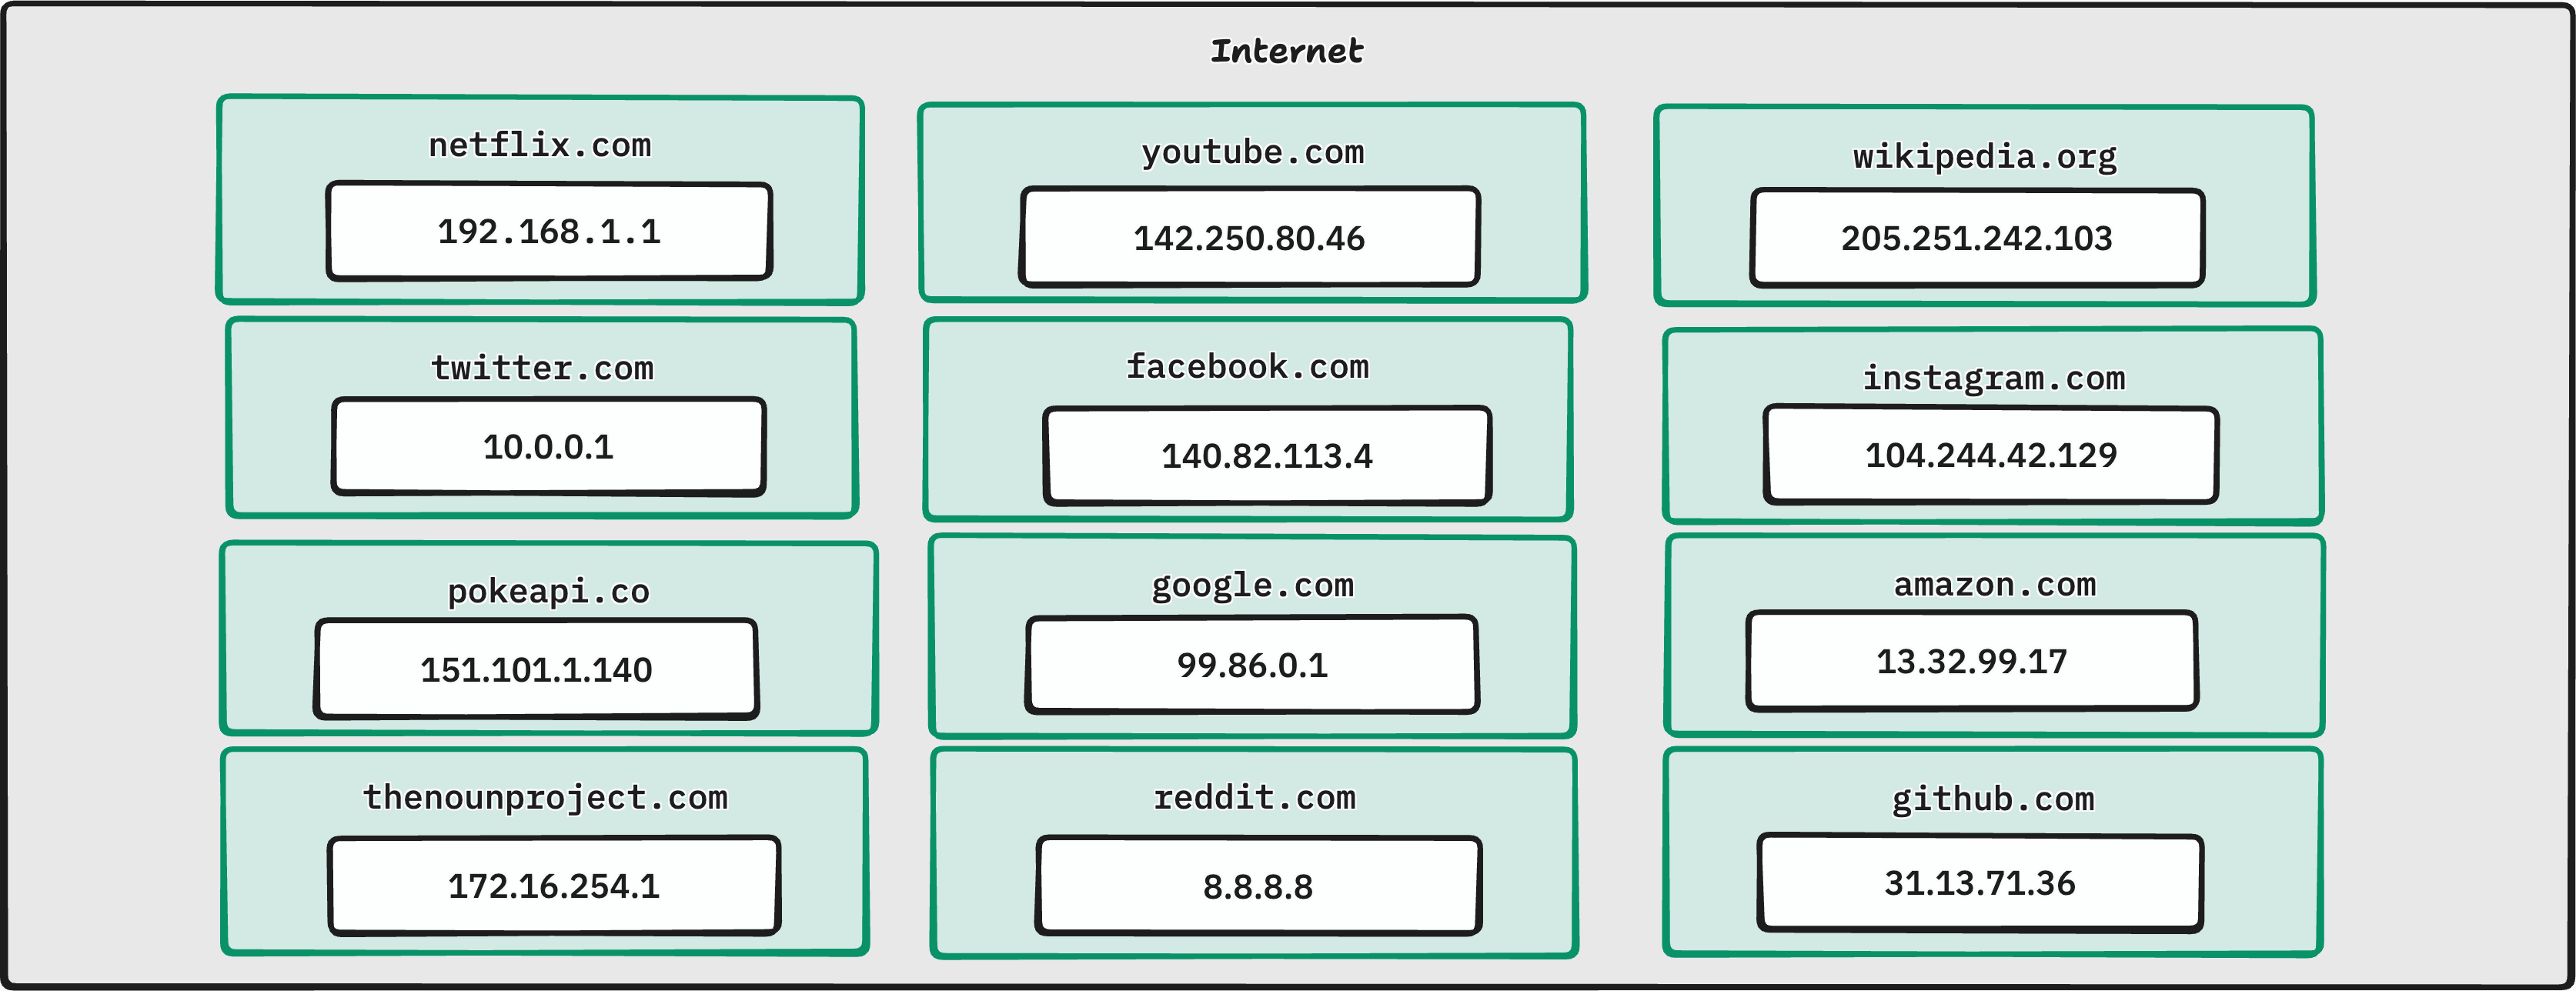
This is where DNS (Domain Name System) comes in. DNS is essentially a giant phone book for the internet. It maps human-readable domain names (like google.com) to their underlying IPv4 addresses (like 142.250.80.46). When you type google.com into your browser:
- Your computer asks a DNS resolver: "What is the IP address for
google.com?" - The resolver looks it up and returns the IP address.
- Your browser connects directly to that IP address.
You never see any of this — it happens in milliseconds in the background.
Seeing it in action
You can observe DNS resolution yourself using the nslookup command, which is available on macOS, Linux (including WSL), and Windows.
nslookup google.com
Output:
Server:         192.168.1.1
Address:        192.168.1.1#53

Non-authoritative answer:
Name:   google.com
Address: 142.250.80.46
Try a few more:
nslookup github.com
Non-authoritative answer:
Name:   github.com
Address: 140.82.113.4
nslookup amazon.com
Non-authoritative answer:
Name:   amazon.com
Address: 205.251.242.103
Notice that each domain resolves to a specific IP address. That address is the actual location of the server you are communicating with whenever you visit that site. DNS simply makes it so you don't have to remember the number.
Hosting Providers
Now that we know servers are physical machines, the next question is: where do we get one?
You have two options:
- Buy and manage your own physical hardware — expensive, requires a data center, power, cooling, and a dedicated ops team.
- Rent server capacity from a hosting provider — pay for only what you use, let someone else manage the hardware.
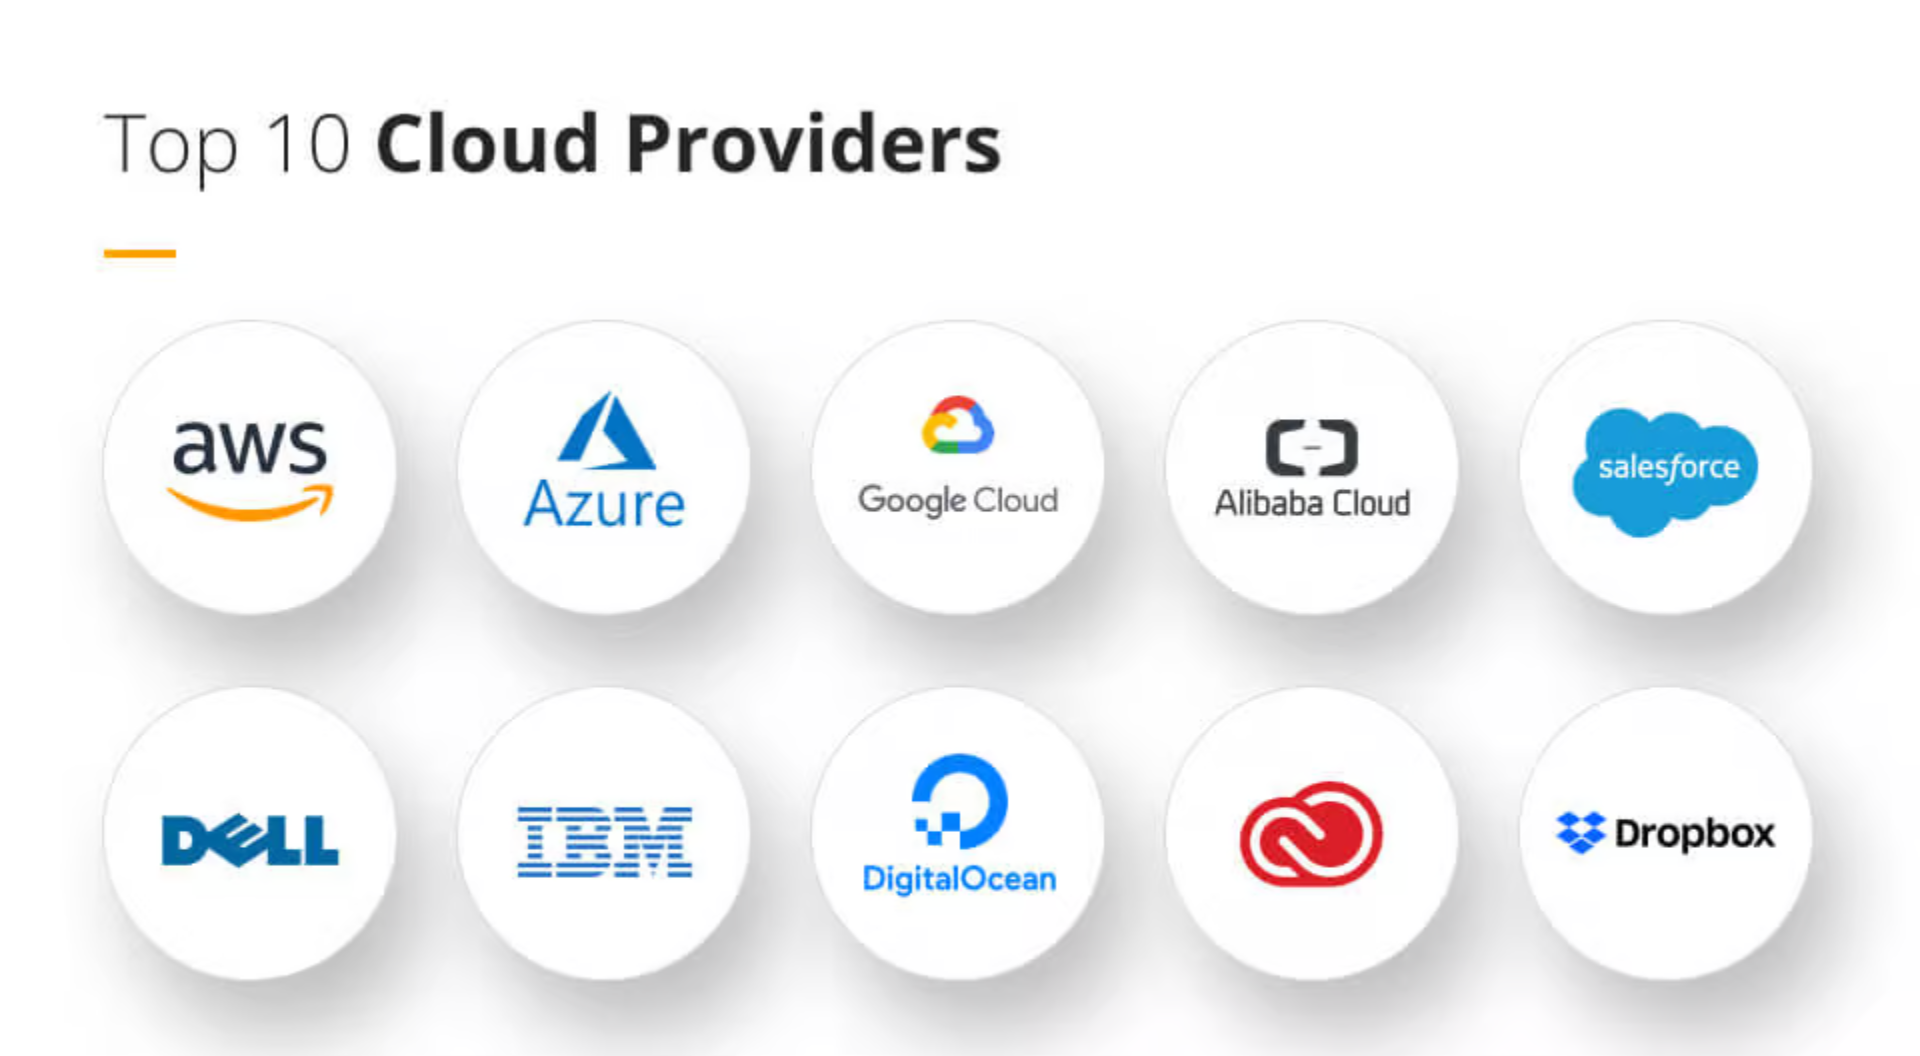
For virtually all modern software development, option 2 is the right choice. Hosting providers own massive data centers filled with thousands of servers, and they rent access to those servers — or slices of them — to developers and companies around the world.
The major players are:
Azure
Microsoft's cloud platform. Deeply integrated with the Microsoft ecosystem (Active Directory, .NET, Windows Server). Commonly chosen by enterprises already invested in Microsoft products.
AWS
Amazon Web Services. The largest and most widely used cloud provider in the world. Offers the broadest range of services and has the largest community and documentation base. We will be using AWS in this curriculum.
Google Cloud
Google's cloud platform. Strong in data analytics, machine learning (TensorFlow, Vertex AI), and Kubernetes (Google invented it). Preferred by teams working heavily in the ML/AI space.
Netlify
A specialized platform focused on static site and front-end deployment. Dramatically simpler than AWS/Azure/GCP but far more limited in what it can host. Excellent for React apps, static sites, and JAMstack architectures.
Others
- DigitalOcean — developer-friendly, simpler pricing, great for small-to-medium projects
- Heroku — very beginner-friendly PaaS (Platform as a Service), abstracts away most infrastructure concerns
- Render — modern alternative to Heroku, generous free tier
- Linode (Akamai) — similar to DigitalOcean, competitive pricing
Choosing your provider
| Provider | Best For | Ease of Use | Free Tier | Relative Cost |
|---|---|---|---|---|
| AWS | Full-stack apps, enterprise, broad services | Moderate | Yes (limited) | Medium–High |
| Azure | Microsoft/enterprise environments | Moderate | Yes (limited) | Medium–High |
| Google Cloud | ML/AI workloads, data pipelines | Moderate | Yes (limited) | Medium–High |
| Netlify | Static sites, front-end only | Very Easy | Yes (generous) | Low |
| DigitalOcean | Small–medium full-stack apps | Easy | No | Low–Medium |
| Heroku | Quick prototypes, beginners | Very Easy | No (removed) | Medium |
| Render | Modern Heroku alternative | Easy | Yes (limited) | Low–Medium |
For this curriculum, we will use AWS — it is the industry standard and understanding it will transfer to virtually any professional environment you enter.
AWS EC2 Instance
What is AWS EC2
EC2 stands for Elastic Compute Cloud. It is AWS's service for renting virtual machines — computers you can access over the internet, configure however you like, and run your applications on.
The word "elastic" is important: you can scale your compute resources up or down based on demand. Spin up one server today, spin up fifty tomorrow if you need them, and shut them all down when you don't.
An EC2 instance is a single virtual machine running in one of AWS's data centers. From your perspective, it behaves exactly like a computer — because it is one.
My Machine VS EC2
Your local machine and an EC2 instance have more in common than you might expect. Here is how they compare:
| Your Local Machine | EC2 Instance | |
|---|---|---|
| Operating System | macOS / Windows / Linux (WSL) | Linux (typically Ubuntu) |
| File System | Local SSD/HDD | EBS (Elastic Block Store) volume |
| Terminal Access | Direct (open Terminal/WSL) | SSH over the internet |
| Network Interface | Router / WiFi | Virtual network interface (VPC) |
| IP Address | Private, assigned by your router | Public IPv4 assigned by AWS |
| Running Processes | Same concept (ps, top, kill) | Same concept |
| Package Manager | brew / apt / winget | apt (on Ubuntu) |
| Users & Permissions | Same Unix model | Same Unix model |
| Shutting Down | Press power button | Stop/terminate instance in AWS |
What's the same: The underlying operating system works identically. Shell commands, file permissions, running services, installing packages — all of it works just as it does on your Linux/WSL/macOS environment.
What's different: You don't have a monitor or keyboard attached to it. You interact with it entirely through SSH (Secure Shell) over the internet. AWS also manages the physical hardware, networking, and storage underneath — you never touch any of that.
Creating an EC2 Instance
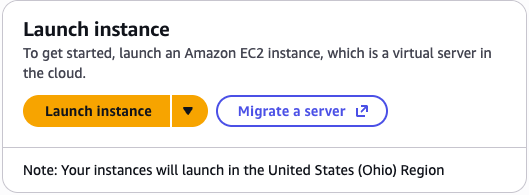
Log in to the AWS Management Console, navigate to EC2, and click Launch Instance. We will walk through each configuration step below.
Amazon Machine Image (AMI)
An AMI is a pre-built operating system image that your EC2 instance will boot from. Think of it like choosing which OS to install when setting up a new computer — except AWS has already done the installation for you.
Available options include:
- Amazon Linux — AWS's own Linux distribution, optimized for EC2
- macOS — available on dedicated Mac hardware instances (not free tier)
- Ubuntu — one of the most popular Linux distributions, widely used in production
- Windows Server — for Windows-based workloads
- Debian — minimal, stable Linux distribution
We will use Ubuntu Server 24.04 LTS (HVM), SSD Volume Type.
Let's break down what that name means:
| Term | Meaning |
|---|---|
| Ubuntu Server | The server edition of Ubuntu — no graphical desktop, minimal footprint |
| 24.04 | Released April 2024 |
| LTS | Long-Term Support — security updates guaranteed until April 2029 |
| HVM | Hardware Virtual Machine — full virtualization, best performance and compatibility |
| SSD Volume Type | The root disk is backed by an SSD (faster than magnetic HDD) |
Capabilities:
- Full Ubuntu Linux environment — any package in the apt ecosystem is available
- Runs web servers (Nginx, Apache), application servers (Gunicorn), databases (PostgreSQL), containers (Docker)
- Compatible with the vast majority of open-source software
Limitations:
- No graphical desktop — terminal-only access
- On a t3.micro, RAM is limited (1 GB) — not suitable for memory-intensive workloads
- Root volume is not automatically backed up — you must configure snapshots separately
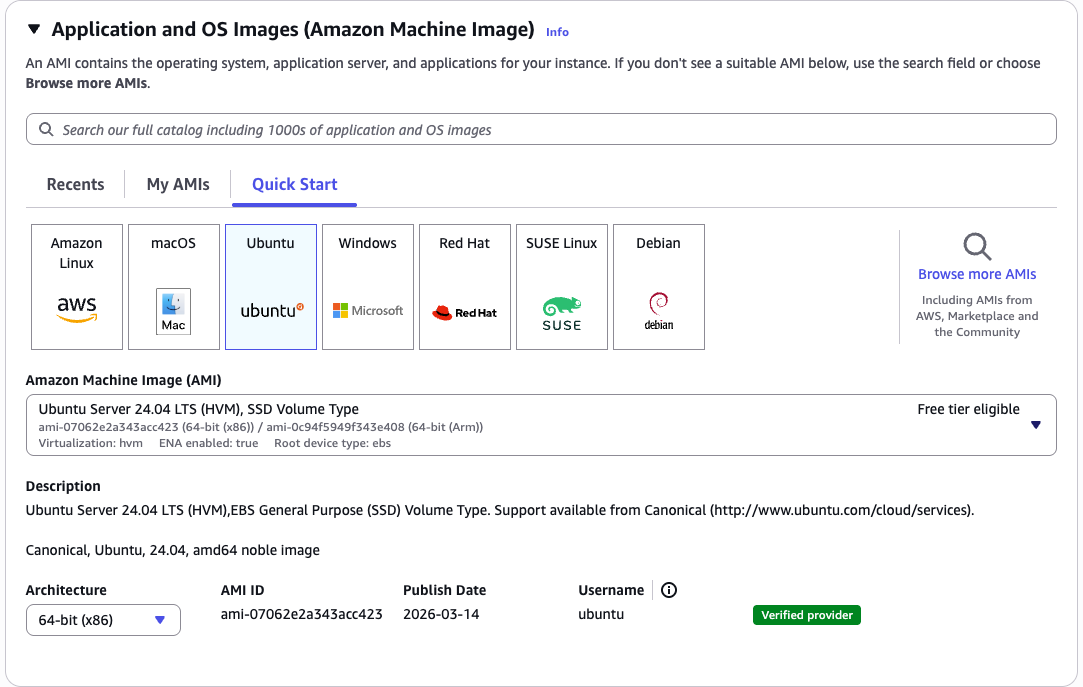
The AMI selection screen shows a search bar and a list of available images. You should see "Ubuntu Server 24.04 LTS (HVM), SSD Volume Type" near the top of the Quick Start list. Confirm the architecture is 64-bit (x86) and click Select.
Instance Type
The instance type determines how much CPU and RAM your virtual machine has. AWS organizes instance types into families:
t— general purpose, burstable (good for variable workloads)c— compute-optimized (good for CPU-intensive tasks)m— memory-optimizedr— storage-optimized
The number and suffix after the family letter indicate the generation and size. Here are the three types relevant to us:
| Instance Type | vCPUs | RAM | Free Tier Eligible | Strengths | Weaknesses | Estimated Cost |
|---|---|---|---|---|---|---|
| t3.micro | 2 | 1 GB | Yes | Free for 750 hrs/month (first year), good for learning and low-traffic apps | Limited RAM, burstable CPU (throttled under sustained load) | ~$0.0104/hr after free tier |
| t3.small | 2 | 2 GB | No | Better RAM headroom, still affordable | Not free tier, costs add up for hobby projects | ~$0.0208/hr |
| c7i.flex.large | 2 | 4 GB | No | Compute-optimized, great for CPU-bound workloads, flexible baseline | More expensive, overkill for simple web apps | ~$0.09/hr |
We will use t3.micro — it falls within the AWS Free Tier (750 hours per month for the first 12 months), which means you can run it for free while learning.

The Instance Type screen displays a searchable table of all available types. Filter by "t3.micro" and select it. You should see the "Free tier eligible" label appear next to it. The summary panel on the right will update to show 2 vCPUs and 1 GiB Memory.
Create & Download PEM Key
To connect to your EC2 instance via SSH, you need a key pair — a set of cryptographic keys that prove your identity without requiring a password.
AWS holds the public key and places it on your instance when it launches. You download the private key (.pem file) and store it on your local machine. When you SSH in, your machine presents the private key, AWS verifies it against the public key, and access is granted.
Important: You cannot download this key again after this step. If you lose it, you lose SSH access to the instance. Treat it like a password.
Steps:
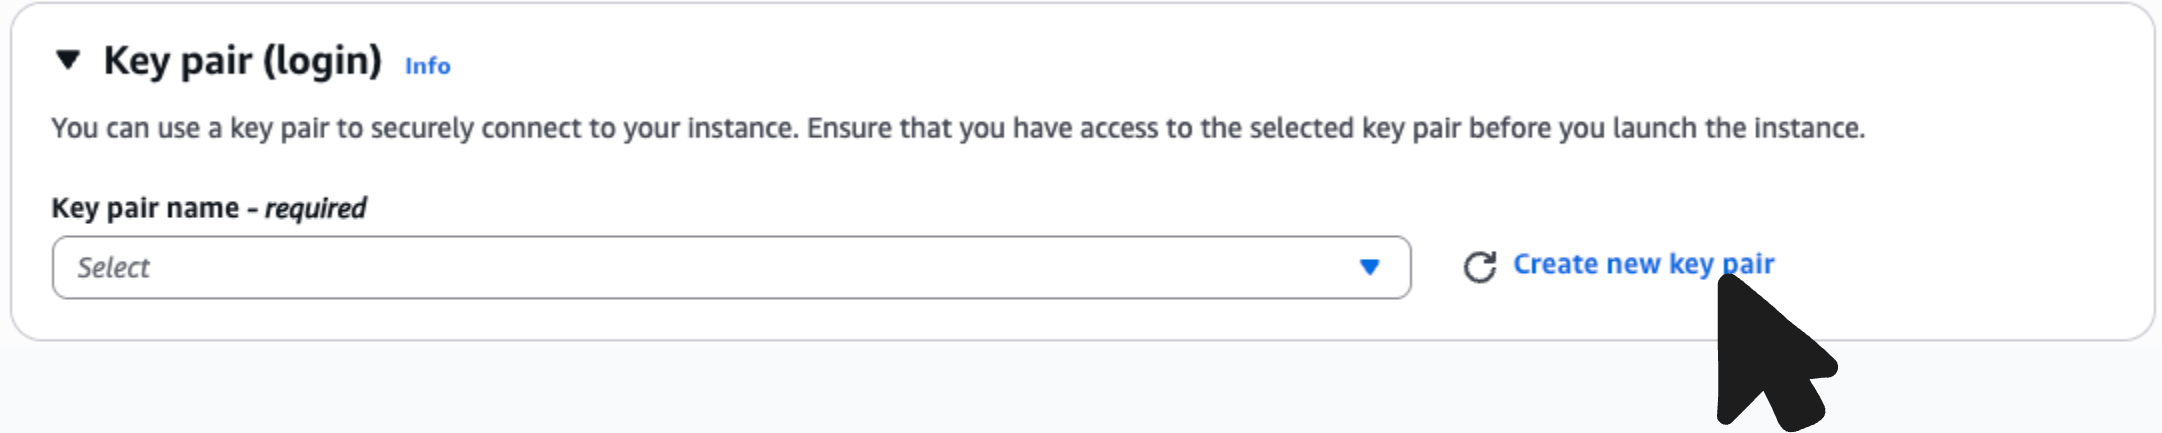
- Under Key pair (login), click Create new key pair.
- Give it a descriptive name (e.g.,
my-ec2-key). - Choose RSA as the key pair type and .pem as the file format (for use with OpenSSH on macOS/Linux/WSL).
- Click Create key pair — the
.pemfile will download automatically.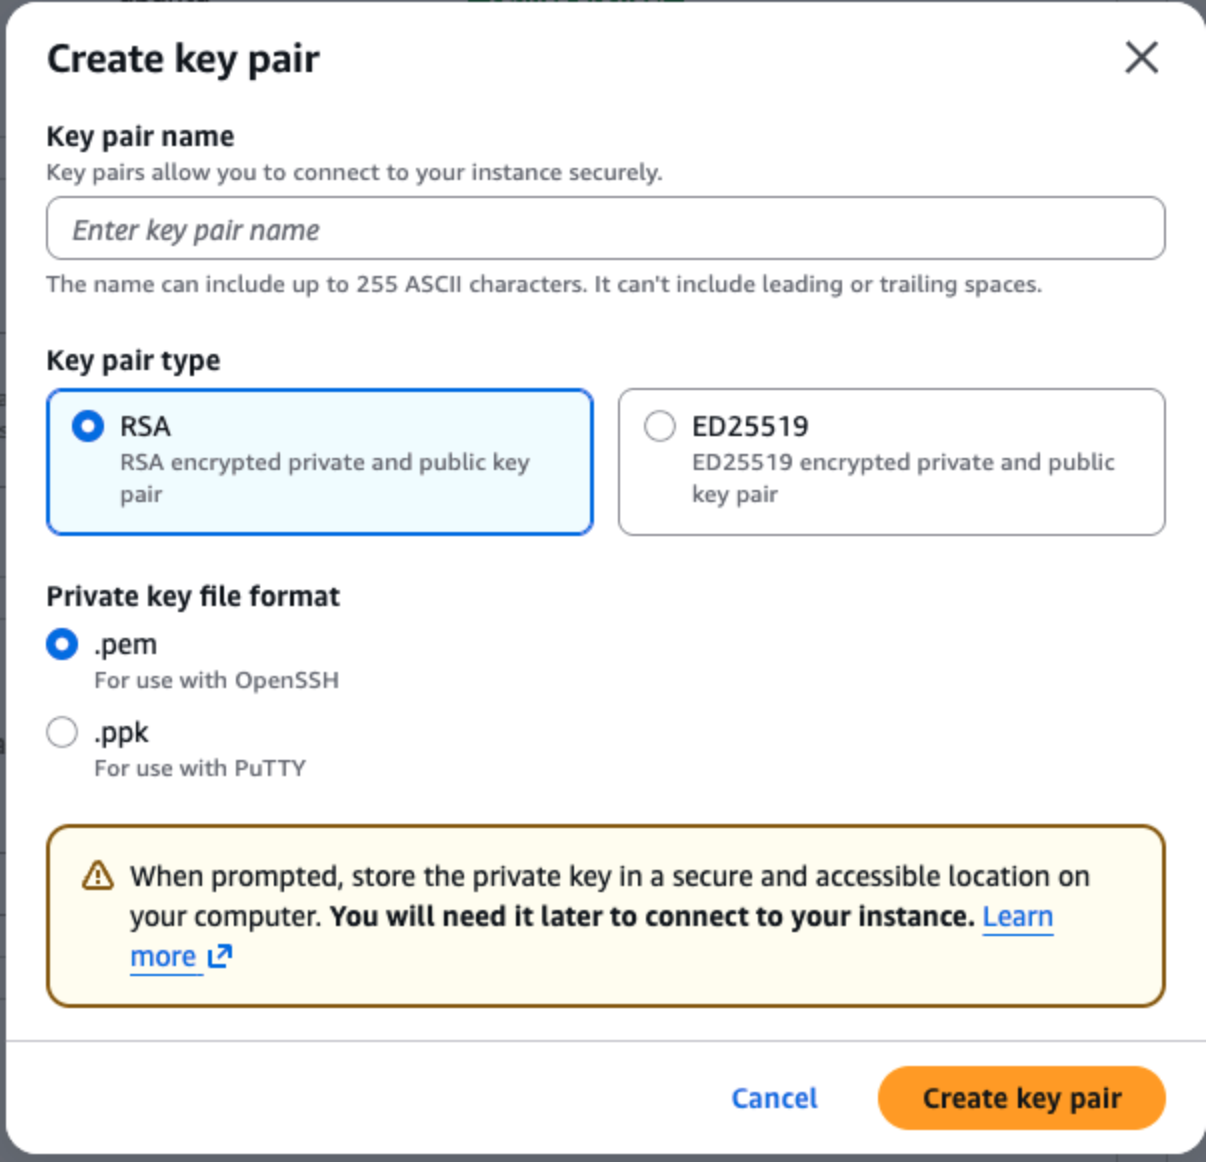
- Move it somewhere safe
mv ~/Downloads/my-ec2-key.pem ~/.ssh/
The key pair creation modal shows fields for name, key pair type (RSA / ED25519), and file format (.pem / .ppk). After clicking "Create key pair," your browser will immediately begin downloading the
.pemfile.
Network Settings
The network settings section controls who is allowed to connect to your instance and on which ports. This is enforced by a Security Group — essentially a firewall that AWS manages for you.
There are three types of traffic to configure:
SSH Traffic (Port 22)
SSH is the protocol you will use to log in to your instance from the terminal. You have three options for who can initiate an SSH connection:
| Option | Who Can Connect | When to Use |
|---|---|---|
| Anywhere (0.0.0.0/0) | Any IP address on the internet | Convenient for learning, but less secure |
| My IP | Only your current public IP address | Better security; use this when possible |
| Custom | A specific IP range you define | For team environments or VPN-based access |
For this course, My IP is recommended — it restricts SSH access to your machine only, while still being easy to set up. Be aware that if your IP address changes (e.g., you switch networks), you will need to update this rule.
HTTP Traffic (Port 80)
HTTP is the protocol browsers use for unencrypted web traffic. Allowing HTTP from Anywhere means anyone on the internet can reach your application on port 80. You will typically want this enabled once your app is running.
HTTPS Traffic (Port 443)
HTTPS is the encrypted version of HTTP. Modern browsers expect HTTPS for any production site. Allowing HTTPS from Anywhere enables secure browser connections to your app. We will configure SSL certificates in a later lesson.
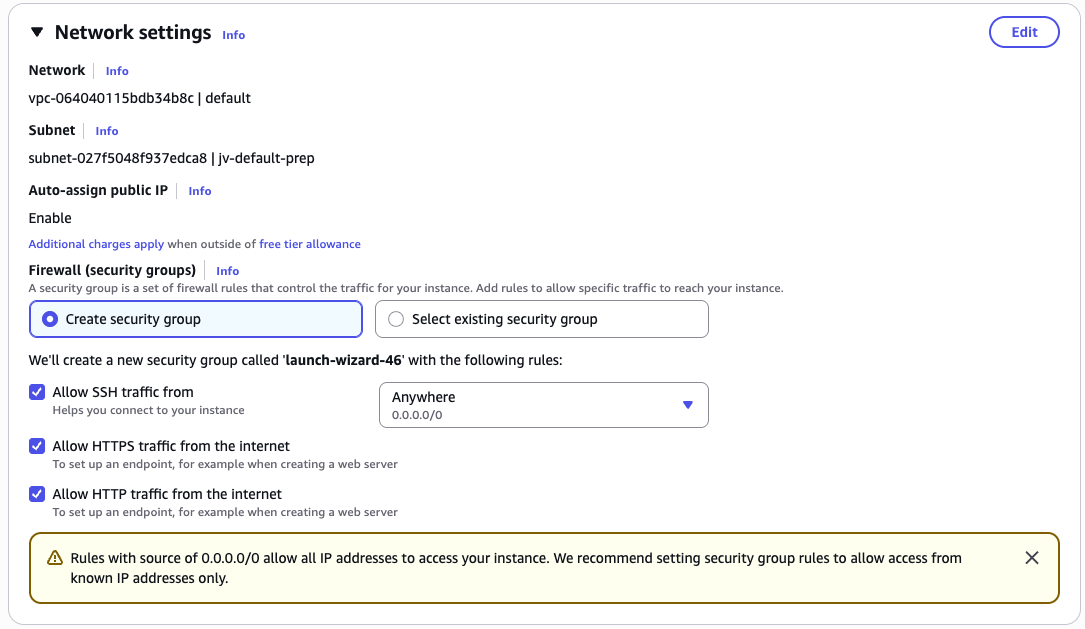
The Network Settings section shows three checkboxes — "Allow SSH traffic from," "Allow HTTP traffic from the internet," and "Allow HTTPS traffic from the internet." Each has a dropdown. Set SSH to "My IP," and check both HTTP and HTTPS boxes.
Once you have configured all settings, click Launch Instance. AWS will take a moment to provision your machine. You will see a success banner with a link to your new instance ID.
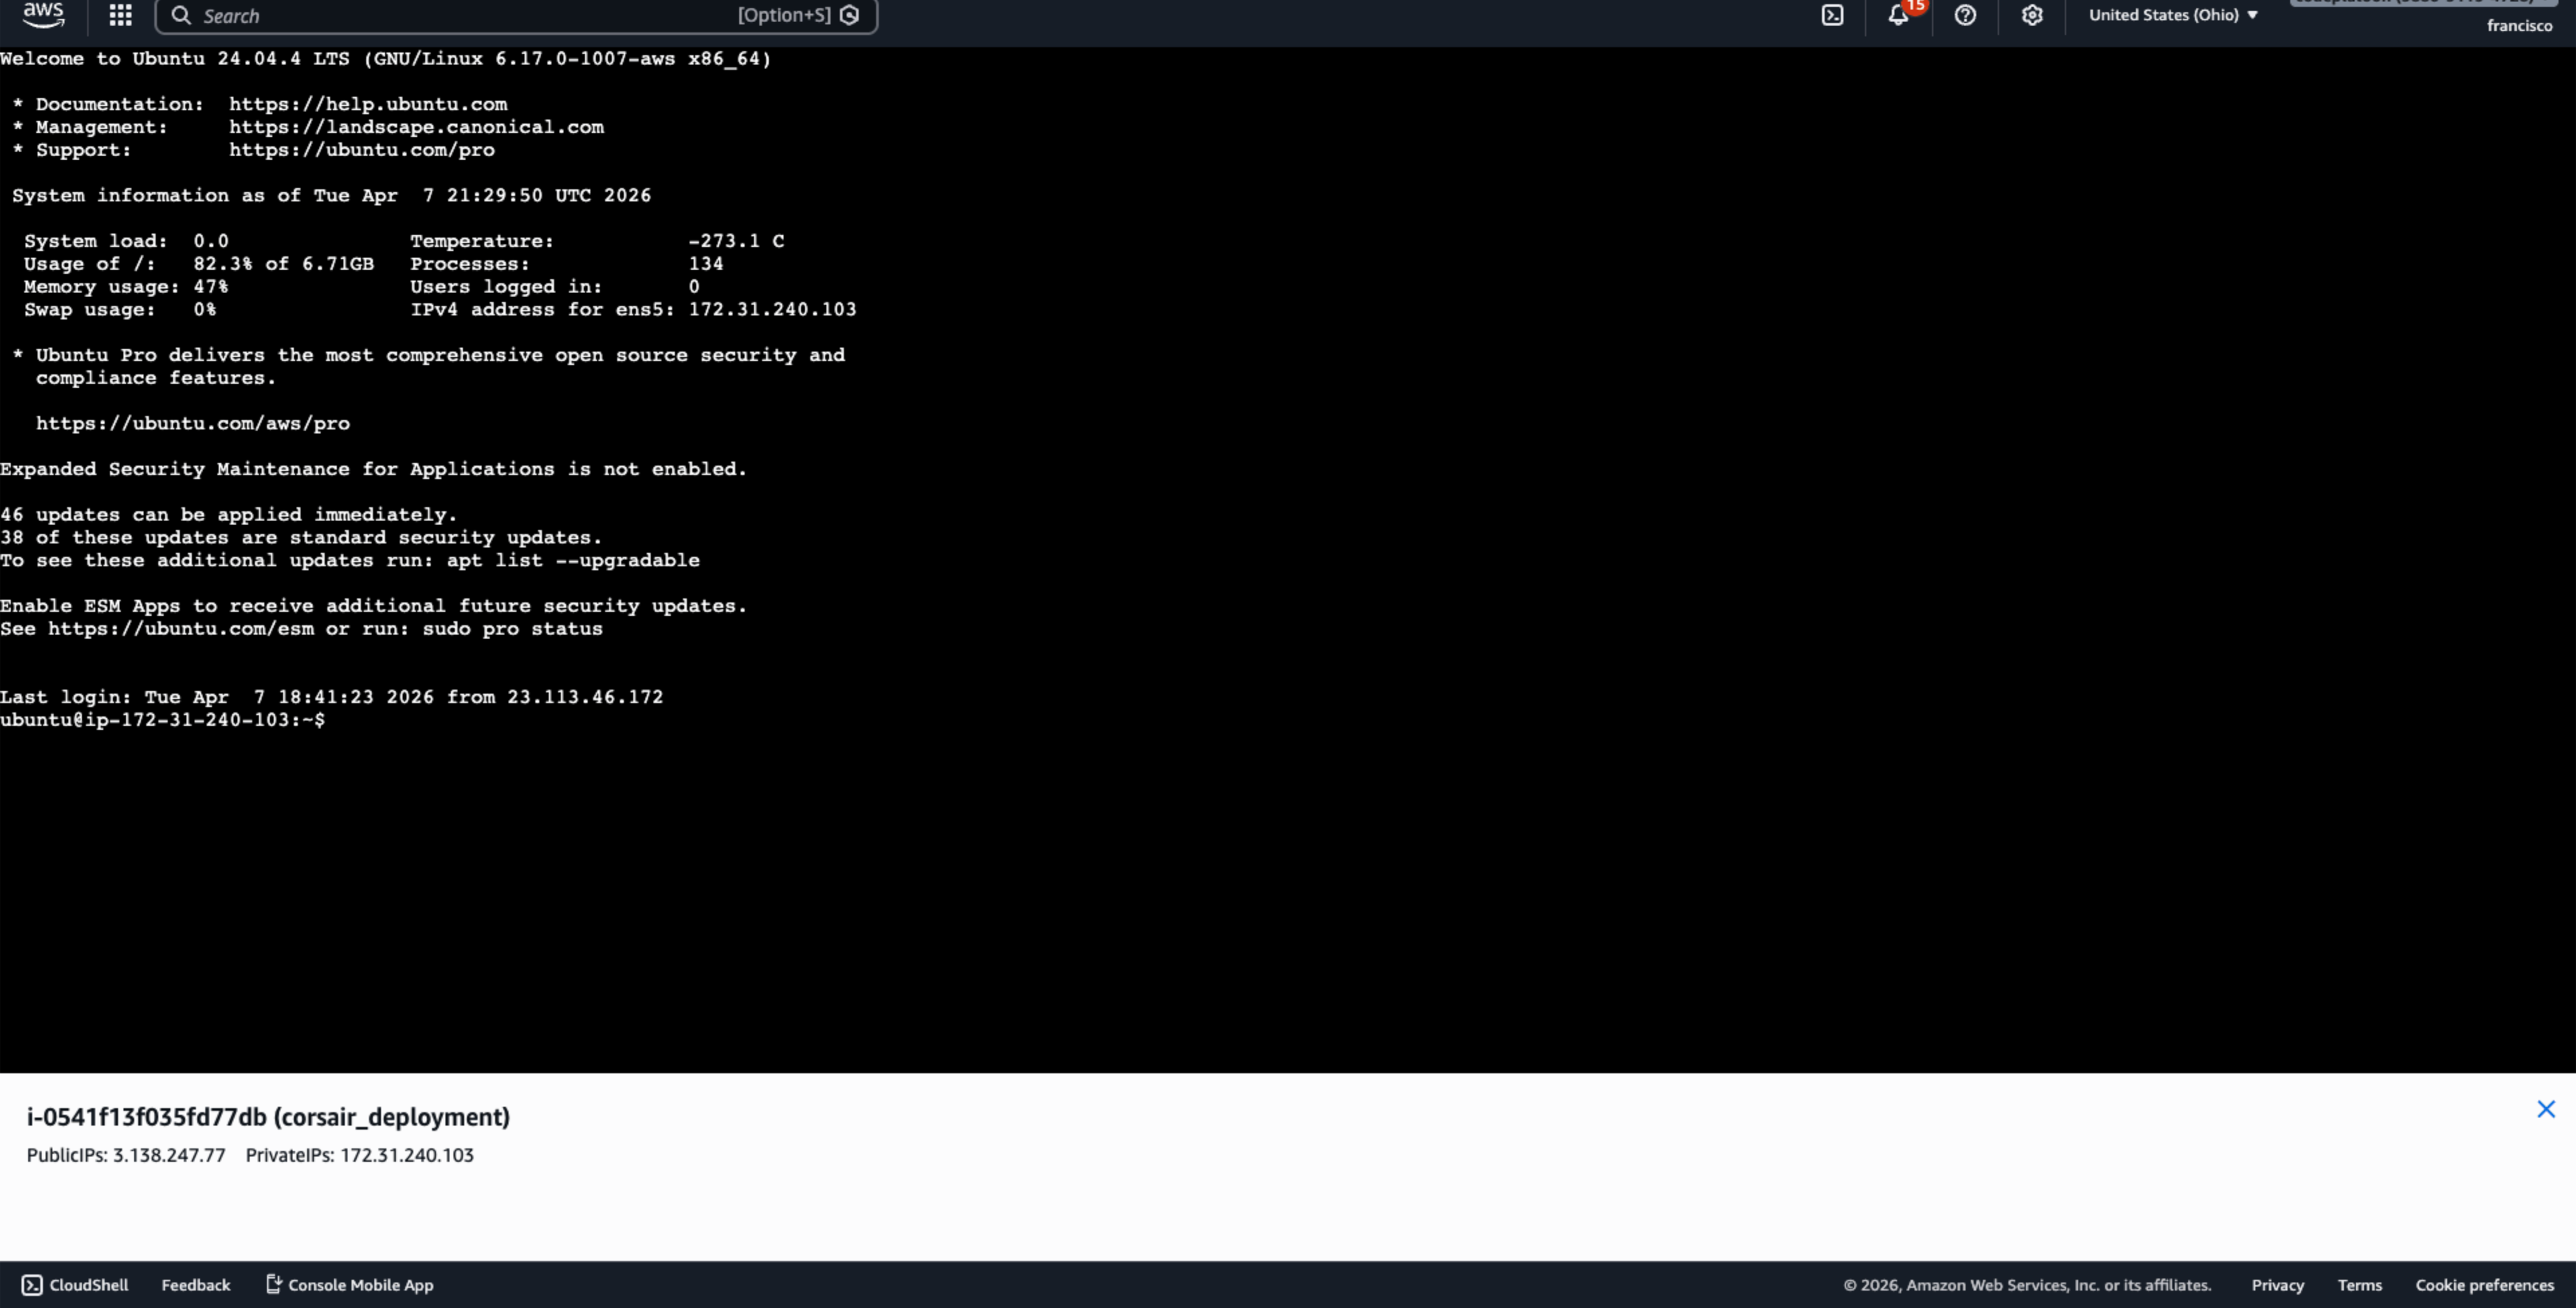
Entering EC2 within AWS Portal
Once your instance is launched you'll be directed to the info page of you ec2 instance and/or provided a link to reach it. Once you open this page you'll find at the top of the instance a header that looks like the following image with a button that states connect click on said button and click connect on the follow on page.

That will take you over to your ec2 instance portal where you can interact with your virtual machine.
Conclusion
The internet is a global network of physical servers, each identified by an IPv4 address and made human-accessible through DNS. Hosting providers like AWS abstract away the hardware so developers can rent compute capacity on demand.
In this lesson you:
- Learned how the internet routes requests using IP addresses and DNS
- Compared the major hosting providers and when to choose each
- Understood what an EC2 instance is and how it relates to your local machine
- Launched your first EC2 instance on AWS with a configured AMI, instance type, key pair, and security group
- Navigated the EC2 console to locate your running instance and find your connection details
In the next lesson, we will connect to this instance over SSH and begin setting up our server environment.